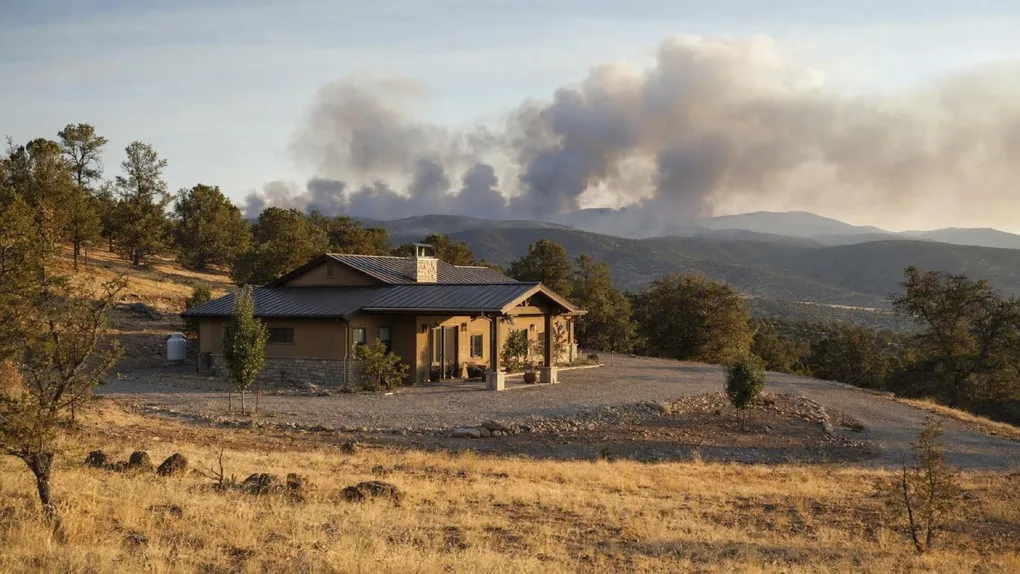
Prepping for a drought (Part 6): The fire connection
Drought and wildfire are inextricably linked. As the lack of rain turns soil to dust, it transforms the vegetation around your home, trees, shrubs, and grass, into “Class A” fuel. A landscape that was once a lush garden becomes a standing tinderbox waiting for a spark. But the danger rarely comes from a wall of flames marching up your driveway.
The true assassin of the suburban home is the ember storm. In a major wildfire, burning brands and sparks can travel up to a mile ahead of the fire front, landing in dry gutters, drifting into attic vents, or settling into the mulch next to your siding. Statistics show that up to 90% of homes destroyed in wildfires are ignited by embers, not by direct contact with the fire itself. The fire investigator’s statistic that changed how I see my own house: up to 90% of homes destroyed in wildfires are ignited by embers, not by the fire itself. Not the wall of flame on the ridge two miles away. Burning brands lofted on the wind, traveling up to a mile ahead of the front, landing in dry gutters, drifting through attic vents, settling into the wood mulch beside your siding. One ember in the wrong bed of dry needles is all it takes.
Drought is what loads that gun. Every week of dry heat turns the landscape into fuel, which is why fire hardening belongs in a drought series. But here is the part I find genuinely hopeful: up to 90% of those homes were not stopped by a fire department’s wall of water. They were lost to a spark that found fuel. Which means you do not have to stop a forest fire. You just have to stop a spark.
This is Part 6 of the drought series: how homes actually ignite, the zone defense that starves the spark, the structural upgrades that close its entries, and the habits that change when the red flag warning goes up.
Disclaimer: The information provided in this article is for general informational and educational purposes only. It is not intended as, and should not be considered, legal or architectural advice. Fire codes vary by municipality and state. Always consult your local fire department for specific inspections and codes.
The Readiness Audit
If embers landed on your house tonight, where would they find fuel?
- Green: The first 5 feet around your house is non-combustible, your vents have 1/8-inch metal mesh, and your gutters are clean.
- Yellow: You have some defensible space but wood mulch touches the house and the gutter is full of last season’s leaves.
- Red: You have firewood stacked on the porch and juniper bushes under the windows.
If you are Yellow or Red, execute Phase 1 immediately.
Phase 1: The Physics of Ignition (How Homes Burn)
Goal: Understand the three ways fire reaches a house, because each has a different countermeasure.
- Direct flame contact: the fire front physically touches the house. Rare in suburban settings unless vegetation touches the walls.
- Radiant heat: the fire is close enough that heat melts siding or shatters windows, allowing fire inside.
- Ember wash: the primary threat. Millions of burning embers lofted by the wind seek out receptive fuel beds like dry leaves, pine needles, or wood mulch on or near the house.
The Takeaway: Since embers, not the flame front, destroy most homes, your enemy is a drifting spark. Everything in this part follows from that.
Phase 2: The Zone Defense Strategy (Defensible Space)
Goal: Organize your property so incoming embers find nothing to eat.
- Zone 0, the immediate zone (0 to 5 feet): zero combustibles. Remove all wood mulch and replace with gravel, pavers, or concrete. Remove flammable plants (juniper, cypress) from under windows. Move the firewood pile away from the house. Replace coconut-fiber doormats with rubber or metal.
- Zone 1, the intermediate zone (5 to 30 feet): lean, clean, and green. Space trees so their crowns are at least 10 feet apart. Prune branches up to 6 feet from the ground and remove shrubs growing under trees. If you have limited water, use it here to keep plants turgid and resistant to ignition.
- Zone 2, the extended zone (30 to 100 feet): reduction. Remove dead trees, large debris piles, and thick patches of dry brush to slow the fire and keep it on the ground.
The Takeaway: Zone 0 is where sparks land and fires start. If you can only do one thing this weekend, clear the first 5 feet.
Phase 3: Hardening the Structure (The Shield)
Goal: Close the entry points embers use to get inside.
- The roof and gutters: your roof should be Class A fire-rated (asphalt, metal, tile). Gutters are the most common ignition point: install metal gutter guards, or clean them weekly during fire season.
- The vents (the invisible entry): attics draw in air to cool the house, and in a fire they suck in embers. If you can fit a pencil through the mesh, it is too big. Retrofit all exterior vents with 1/8-inch non-combustible metal mesh, never fiberglass mesh, which melts.
- Windows and decks: radiant heat can shatter single-pane glass, so multi-pane tempered glass survives much longer. Never store propane tanks, lumber, or cardboard under your deck. Enclose the underside with lattice and mesh if possible.
The Takeaway: The house loses fires through its openings. Gutters and vents are where embers enter, so they are where your money goes first.
Phase 4: Red Flag Protocol (Behavioral Changes)
Goal: Change your own behavior when the weather loads the conditions.
When the National Weather Service issues a red flag warning (high wind plus low humidity), change your habits:
- No mowing: hitting a rock with a mower blade creates a spark. Mow only in the early morning when humidity is highest.
- Hot exhaust: catalytic converters run at 1,200 degrees F. Never park a car over dry grass.
- Towing chains: secure trailer chains so they do not drag and throw sparks.
The Takeaway: On a red flag day, the most likely ignition source in your neighborhood is a resident doing something ordinary. Do not let it be you.
The Essential Kit Checklist
- The 5-foot audit: walk the perimeter and move wood piles, trash cans, and dead potted plants at least 30 feet away.
- The gutter clean: clear dead leaves from gutters and roof valleys.
- The mesh check: inspect attic and crawlspace vents and cover wide mesh with 1/8-inch hardware cloth.
- The ladder fuel prune: trim lower branches for a 6-foot gap from ground to first branch.
- The address check: ensure your house number is reflective and visible from the street.
Scenario Planner (Contingencies)
“I live in the suburbs, wildfire is not my risk.” The trap: thinking ember storms respect city limits. The fix: embers travel up to a mile ahead of the front, and grass fires reach suburbs every dry summer. The zone defense costs an afternoon, not a landscape budget.
“I have wood mulch everywhere and cannot afford to replace it.” The trap: treating the whole yard as the project. The fix: only the first 5 feet must change. Gravel or pavers in Zone 0, keep the wood mulch everywhere else, per Part 3’s moisture strategy.
Next Steps
- Walk your perimeter tonight and clear the first 5 feet. It is the highest-leverage fire project on the property and it costs a wheelbarrow ride.
- Check the vents with a pencil. If it fits through the mesh, buy 1/8-inch hardware cloth on the next hardware run.
- Read Part 7: Foundation protection next, because drought attacks your house from above with fire and from below with shrinking clay.
Originally adapted from public NFPA Firewise and CAL FIRE defensible space guidance (public domain).